This list contains clarification of system behaviours and post-upgrade information relating to features in this release. Please take some time to review.
-
[LCSIL-701] — Personal Injury (Portal) Module. There is a new module to enable clients to upload and progress claims that fall within the category for the Ministry of Justice's Portal. Currently, this module deals with the Claimant only and deals with Stage 1. This feature is chargeable and if you would like to take advantage of it, please contact your account manager or call our Sales Team on 0844 815 5575.
Attach Personal Injury (Portal) Module
To attach the module to a matter, go to the Matter Details page, select the Actions menu then select Add Module to display the Add Module dialog box.
 .
.
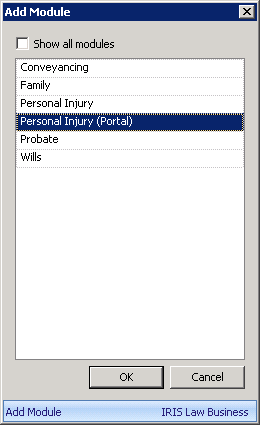
Select Personal Injury (Portal) from the dialog box and click OK.
Once the Personal Injury (Portal) module has been attached to the matter, the Personal Injury (Portal) module icon displays against the matter in matter lists and appears in the top right corner of the matter details screen.
Access Attached Module
Access the module from existing matter is via the usual methods:
1. Right click on the matter and select View Personal Injury (Portal) Details in the following pages - Client Search, Matter Search.
2. From the Matter Details page, you can double click on the module icon towards the top right corner of the page.
3. Via the dashboard in elements such as My Cases, My Favourites and Recently Viewed Files
4. A new dashboard element named "My Live Personal Injury Portal Claims" which display the current status of each matter and provides a one-stop place to view and access your matters.
Using the PI Personal Injury (Portal) Module
Once the matter has been created and the module attached, the data pages display.
On the top right of the screen, the Key Case Details section lists the Claim Reference, MOJ Claim Status and the Status Last Changed date.
There is an icon in the Key Case Details which indicates the claim status:
 - further action by the claimant representative is allowed.
 - no action is allowed, waiting for a response form the compensator.
 - Claim is out of scope of the IRIS Law Business integration.
 - Claim requires an acknowledgement by the claimant representative.
you will see some information already completed under the Data tab. Relevant information is automatically pulled through from PMS such as the client and matter details, fee earner and branch information. Checks are made to ensure the data matches the requirements of the PI Portal, such as address layout or missing fields, such as an email address or telephone number. Postcodes are also checked to ensure they match the correct layout.
Where there is an issue with the data, a warning triangle displays between the test label and the field. Hovering over the triangle will display a tooltip advising what needs to be done to correct the data.
Information relating to the Claimant's Representative is held centrally, so any changes will need to be made by the IRIS Law Business Administrator or a user with administrator permissions. The need for these changes will reduce over time as data is amended to fit the PI Portal format.
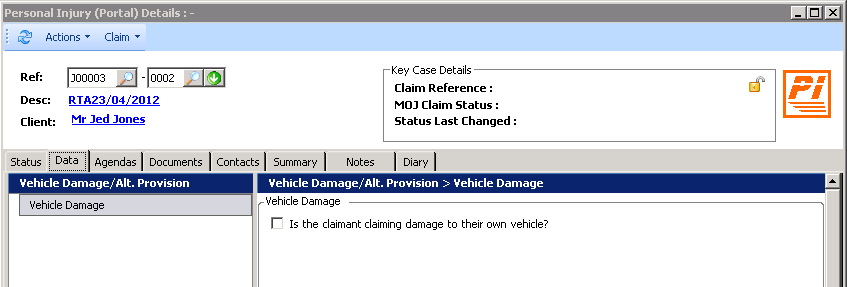
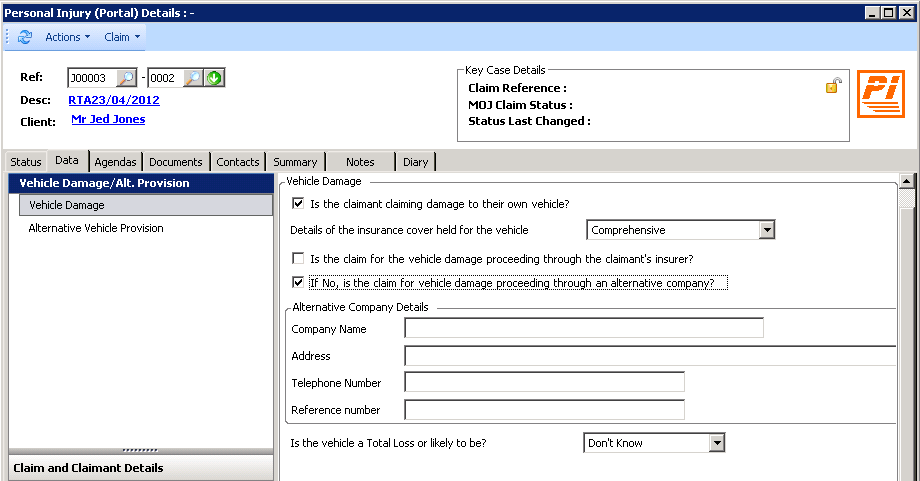
To keep the data pages from becoming too complex and in line with the pages on the PI Portal itself, there are a number of conditional fields that display only depending on previous choices. In the example below, the Vehicle Damage page. Initially there is only one field, a check box to indicate if the claimant is claiming damage to their own vehicle.
However, when this is checked, further fields display which are now relevant.
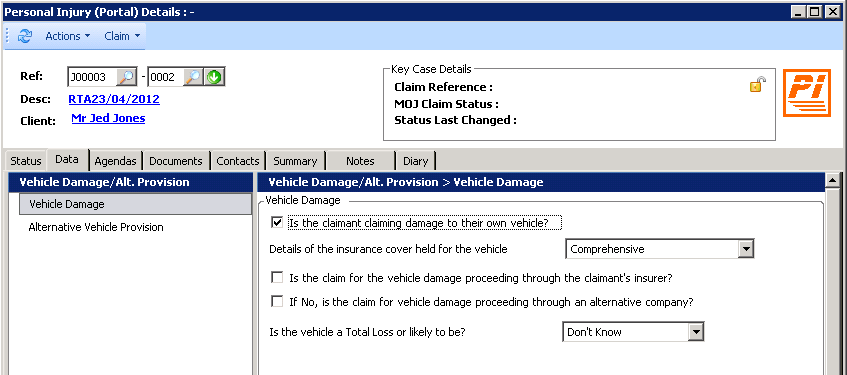
Yet more fields also display if the "If No, is the claim for vehicle damage proceeding through an alternative company?" box is checked so you can enter details of the alternate company.
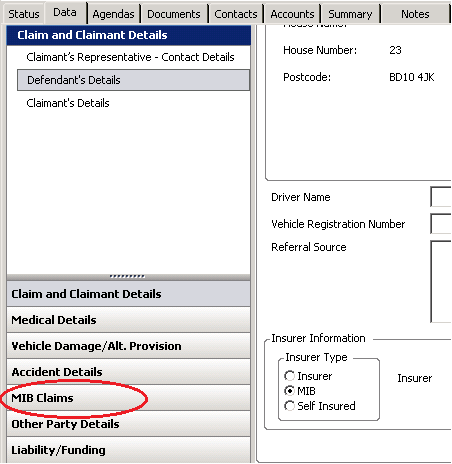
Similarly, as shown below, the MIB claims section in the navigation panel is only available when the Insurer Type on the Defendant's Detail page has been set to MIB.
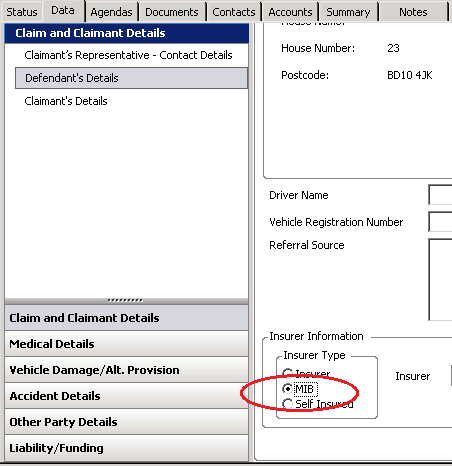
When the Insure Type is set to MIB and you click Apply, the MIB Claim option on the navigation panel displays.
Produce CNF
Once all the details of the claim have been entered into the data pages, you can produce a Claim Notification Form for the client to read and confirm that all the details are correct.
From the Actions menu, select Laserforms, then either Produce CNF (RTA1) or Produce Defendant Only CNF (RTA2) as required.
Submit Claim
When the data has been confirmed, the claim is ready to be submitted. Click on the Actions menu and select Submit Claim.
After a short pause, the system will come back with the Claim Reference and MOJ Claim Status boxes in top-right corner of the module completed.

Once the claim has been submitted, the data pages become read-only and further amendments are no longer allowed.
Submission Failure
If there are any problems with the data or there is an issue with the connection to the portal a suitable message will be displayed.

The message will advise where the data is not acceptable and having checked the data, located and amended the data, you can then submit the claim again.
Should there are any problems with the data, a suitable warning message will display indicating what the problem is in order that you can correct the issue and re-submit the claim.
Claim Submission Following Portal Access Timeout
When a claim is submitted, there is a possibility that you will receive an error message:
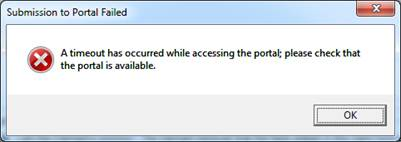
This could be because of an issue with your network or the portal itself.
At this point, IRIS Law Business does not know whether the claim has been successfully uploaded or not.
To prevent a duplicate claim, where a timeout has occurred, when the claim is resubmitted, IRIS Law Business searches the portal for any claims with the same client/matter reference as generated by PMS.
If the search fails to find a matching claim, IRIS Law Business will submit the claim in the normal way.
If the search finds one or more matching claims, a dialog box displays advising:
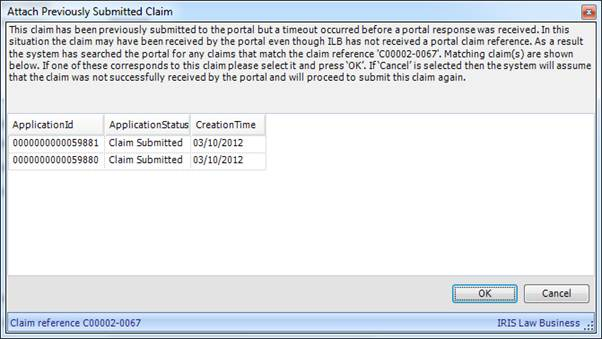
A list of matching claims display detailing the Application ID (Claim Ref), Application Status (MoJ Status) and the Creation Time (Date).
The existing claim is listed
Where the claim listed matches the aborted claim submission, the user should highlight the claim and click OK. IRIS Law Business will then display the portal claim reference in the Key Case Details area.
The existing claim is not listed
Where no claim is displayed, or those displayed are not the same claim, the user should click Cancel. In this situation, the claim is then submitted as standard.
Interacting with the Portal
By default, any interaction with the PI Portal will be recorded under the Status tab. However, IRIS Law Business can also be set up to notify the matter fee earner by email, advising them of any change in a case's status. The fee earner will need to have a valid email address set in their Contact Info tab in their Staff record under Licensing and Users. Where a fee earner has a number of matters that have been updated, they will only receive one email with all relevant updates listed.
Once a claim has been submitted, it is picked up by the Compensator who can accept the claim, pass the claim on to another branch or user or reject it for a given reason.
If the Compensator accepts a claim, a notification is sent back to IRIS Law Business which is added under the Status tab confirming the acceptance of the claim. The Compensator can decide if Article 75 applies or whether it should come under the MIB insurance type. The Compensator then completes the Insurer First Response pages and the PI Portal then notifies and sends the information to IRIS Law Business. The Compensator can attach and upload relevant files to the claim and IRIS Law Business will update any change in status, the response and download any attachments posted on the portal. The Personal Injury (Portal) module also creates a new group of pages in the module, called Insurer First Response and displays the response in these pages. The portal also sends the CNF in pdf format with the First Response section of the RTA1 form completed. Files can also be uploaded from IRIS Law Business to the PI Portal from the History tab using the right-click shortcut menu and selecting Upload to Portal.
When Liability has been admitted, there is a time scale of 10 days for the Stage 1 payment to be received. When payment has been received, from the Actions menu the user can select Confirm Stage 1 payment / Received or the agenda equivalent to advise the Portal the payment has been received. The process is moved on to Stage 2.1, see below. This is reflected in the Status tab and fields.
If the payment is not received within the set period, the process times out and moves out of the Portal Process. Use the Actions menu and select Confirm Stage 1 payment then Not Received or the agenda equivalent and then use the Exit Process.
The other situations where the PI Portal process will require an exit are when the Compensator instigates it (reject claim, fraud stated), or the Client Representative instigates it (withdraw claim, duplicate claim). In each case the Exist Process can be run from the Actions menu or the Agenda tab with the relevant reason selected.
Should a claim be rejected by the compensator, depending on the reason, the claim can be resubmitted via the Agenda tab or Claim menu. A Claim Rejection sets the status to "RejectedToCR" and the Action menu displays a new item "Allow resubmission" which clears all the claim data except the "CNF" data and removes the read-only attribute so you can amend and add data as required. The claim displays as an unsubmitted claim, however, under the Status tab, the history has an entry recording the fact that the claim was reset for re-submission. The amended claim can be submitted to the existing or a new compensator, using the Claim menu, selecting Resubmit Claim or the Agendas tab and select Stage 1: 1.1 Resubmit Claim. The claim is re-submitted under a new reference, which will be displayed in the MoJ Status fields.
Stage 2
Currently IRIS Law Business does not integration with the PI Portal beyond Stage 1 and you will need to log on to the PI Portal direct to continue the process. However, IRIS Law Business will still receive email and Status updates as and when the portal produces such. This will include any documentation uploaded to or produced by the portal, including the Court Proceedings Pack, if appropriate.
Licence and User Permissions
Administrators can restrict access to the PI Portal submission activities and notifications via the standard User Details Features tab in Utilities / Licensing & Users.
Expand the System Users and User folders and select Staff. Right-click the relevant user record, select Edit and then click on the Features tab in the User Details dialog box.
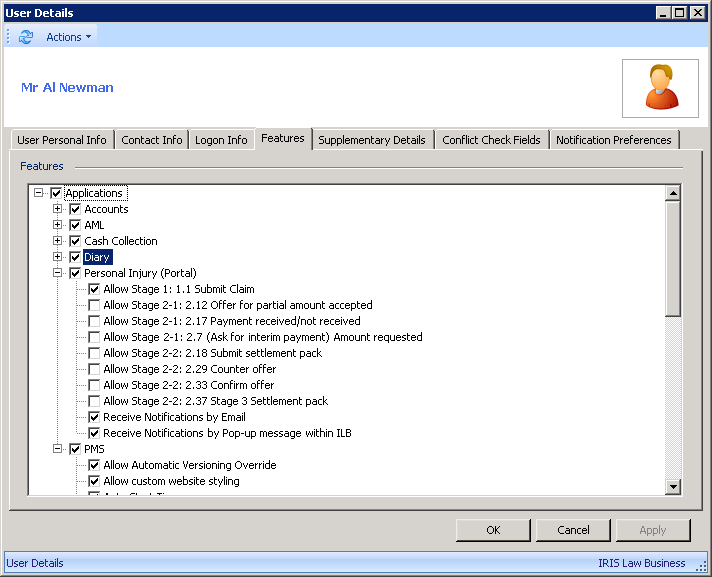
These options are switched off by default for existing users and when new users are created.
Check the boxes to give the users their required activities and notification options. Click OK to confirm.
— Modules
-
[LCSIL-2064]/[LCSIL-2103] — VAT Figures in the All, Office and Disbursement Ledgers. In Accounts Enquiry, there are new columns for the VAT figures under the All, Office and Disbs tabs.
All Tab
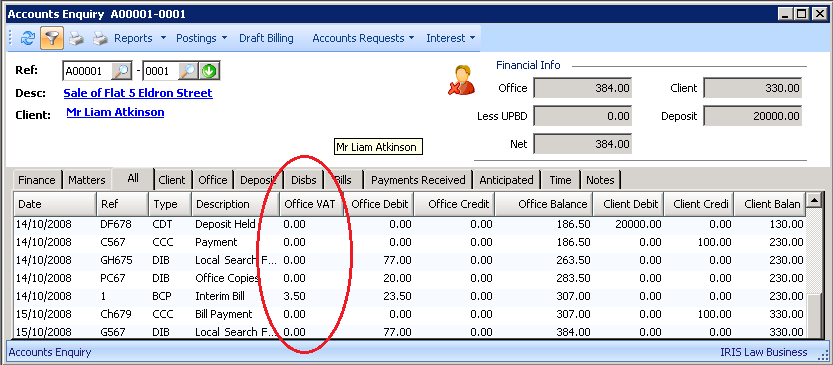
Office Tab

Disbs Tab
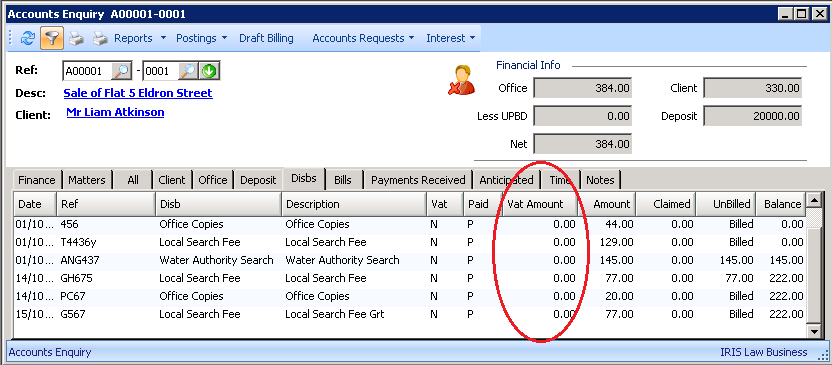
These figures are also included when you take the Export To Excel option from the Report menu.
— Accounts
-
[LCSIL-1704] — Cancel Billing Disbursement. Where an unbilled disbursement has been missed during the bill payment allocation, there is new item in the Posting / Office menu named "Cancel Billing Disbursement" menu item which allows you to cancel the disbursement
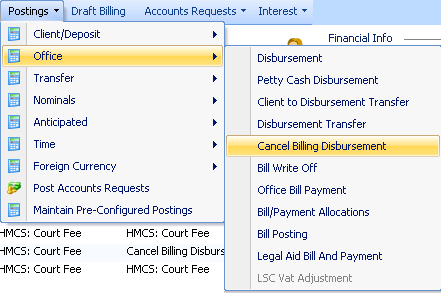
The following dialog box displays with the list of unbilled disbursements.
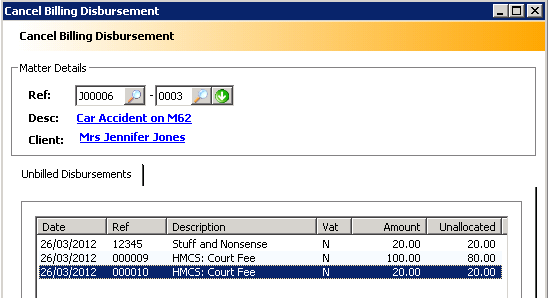
Double click on the disbursement to display the disbursement.
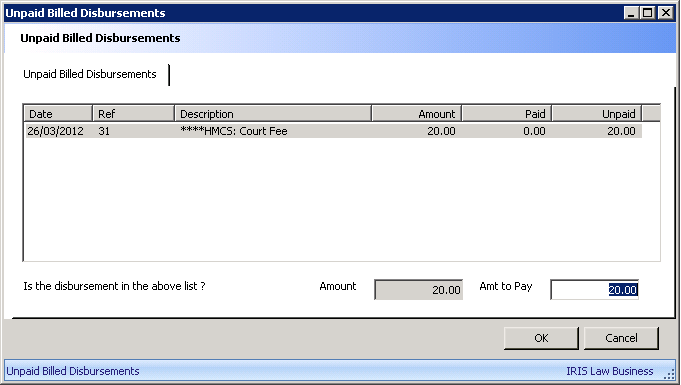
Double click on the disbursement to allocate the "Amt to Pay". Amend the amount to pay, if necessary, and click OK.
Back at the Accounts Enquiry, click on the Refresh tool to display the cancelled disbursement.

— Accounts
-
[LCSIL-2148] — Disbursement Transfers. There is a new posting from the Office postings menu named Disbursement Transfer.
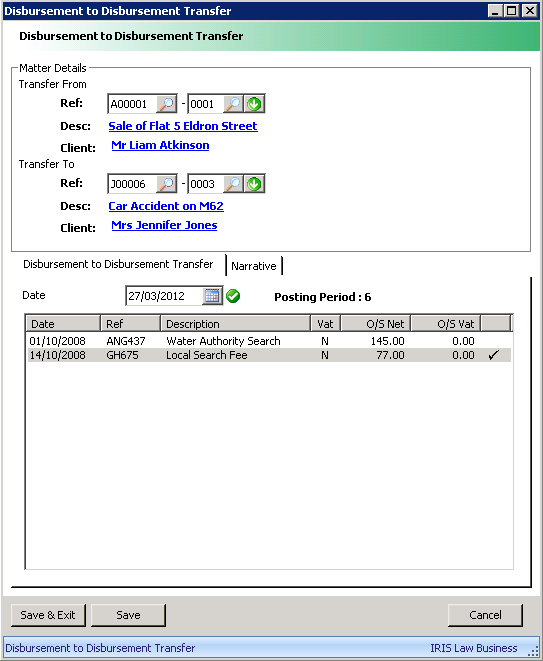
This displays a list of all unbilled disbursements for the current matter. Using the lookups you can select the matter (from a different client if necessary) to transfer to. There is a date validation field and you can select one or more disbursements to transfer by clicking in the right-hand column.
The Narrative tab allows you to enter any additional text. The default will be the original narrative plus the text "transfer from matter ref" and "Transfer to matter ref" in the relevant ledger.
When you click Save or Save & Exit, the reverse postings will display in the original matter's ledger with the two new entries in the "To" matter ledger.
— Accounts
-
[LCSIL-1551] — Unallocate Bill Payments. You are now able to unallocate bill payments where an allocation has been made by mistake or cheque bounces. In Accounts Enquiry, the Bill tab, right-click on the entry to be reversed and select View Allocation from the shortcut menu.
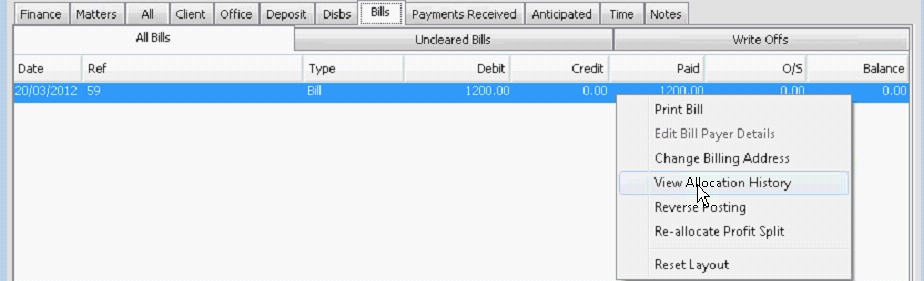
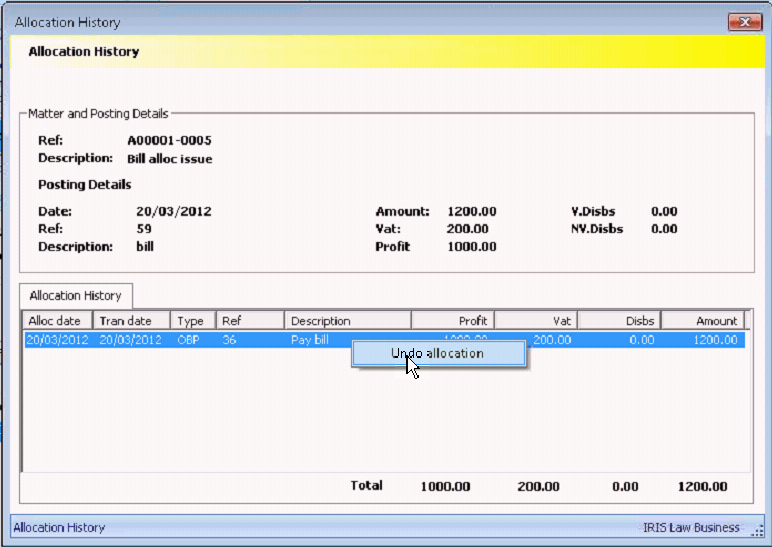
From the Allocation History, you can select the entry, right-click and select Undo Allocation from its shortcut menu.
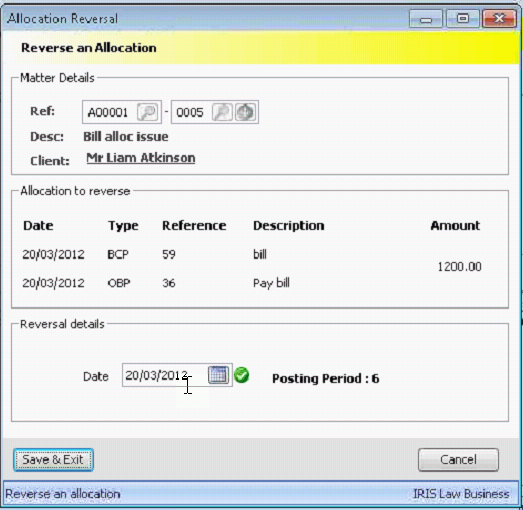
The Allocation Reversal dialog box displays with a date validation field.
Once the allocation has been reversed, both entries will display in the Allocation History. These can be hidden by clicking on the Hide Reversed Postings tool in the Accounts Enquiry screen.
— Accounts
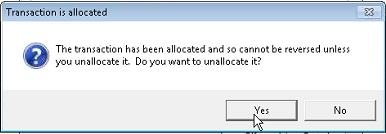
- [LCSIL-1767]/[LCSIL-1768] — Reverse Office Bill Payment Transaction. You are now able to reverse Office Bill Payment transactions. To reverse the bill payment, select the transaction, use the right-click shortcut menu and select Reverse Posting.
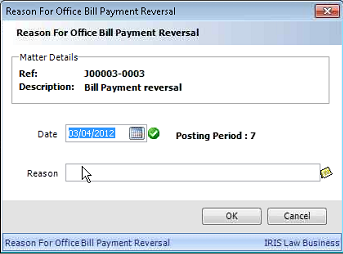
Where the payment has been allocated, a warning message displays to advise the user, but they are still able to proceed.
— Accounts
-
[LCSIL-2055] — Allocate Office Receipt from Client to Unbilled Disbursements. You are now able to allocate an office receipt from the client to unbilled disbursements (non-VATable disbursements only, those with VAT must be billed).
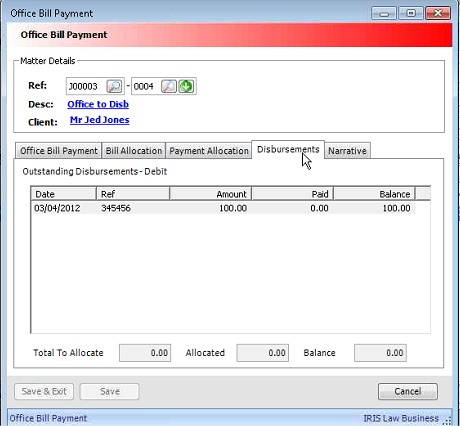
On the Office Bill Payment screen, there is a new tab, Disbursements, which allows the users to select relevant disbursements (non-VATable) for allocation.
— Accounts
-
[LCSIL-2054] — Allocate Disbursement to Disbursement. You are now able to allocate disbursement to disbursement. From the Allocation menu, select Disbursement to Disbursement Allocations.
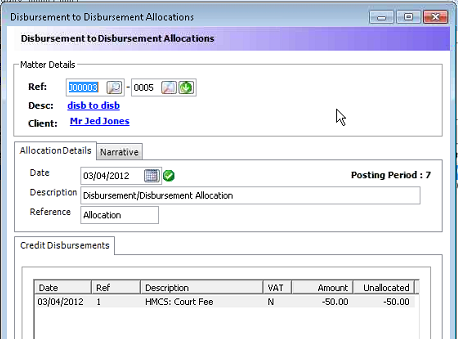
This displays any credit disbursements. Double click on the credit disbursement and a list displays of available debit disbursements. Double click on the appropriate debit disbursement to allocate.
— Accounts
-
[LCSIL-2317] — Payment Allocation Tab in Audit Batch Window. There is a new tab on the batch window that shows all of the payment allocations made in the batch.
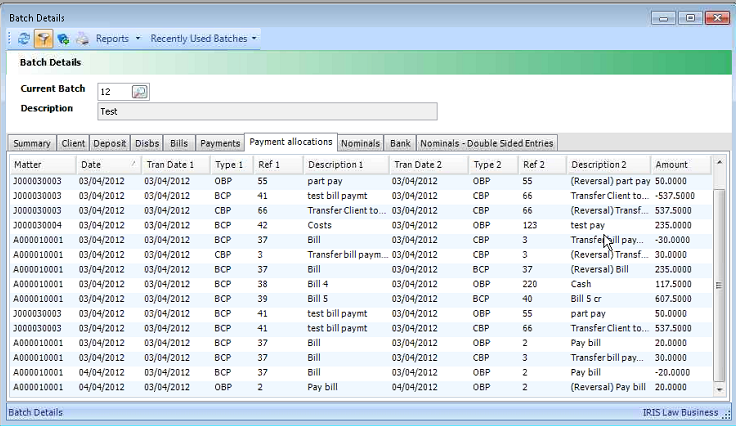
All allocation details and changes are displayed, including Date, Client/Matter Ref, Debit, Credit, Type, Bill Number/Payment Ref, Transaction Description, Audit Note and User ID.
— Accounts
-
[LCSIL-648] — Default Response. There is a new Response type No Response Received in the Marketing Module which is set to be the default response. This is automatically applied to all contacts at the start of a campaign and to any contacts subsequently added.

If you wish to set another response type to be the default, add the new type (or edit it if already there) and check the Default box. Only one response type can be the default and this property will automatically be removed from the existing default.
— Module
-
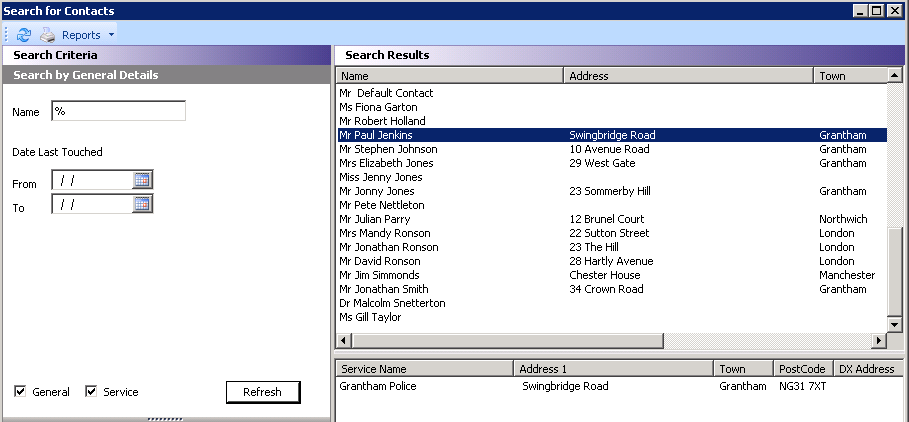
[LCSIL-643] — Search for Service Contacts in Marketing. You can search for service contacts via the General Contact Search window when in the Marketing module. New check boxes have been added to allow you to select General and/or Service contacts.
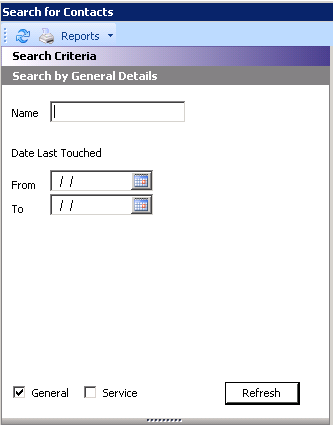
These check boxes are only visible when searching from within the Marketing module and the default setting is to search for General contacts. Also, when you edit a service contact from Marketing the Service Contact screen opens.
— Module
-
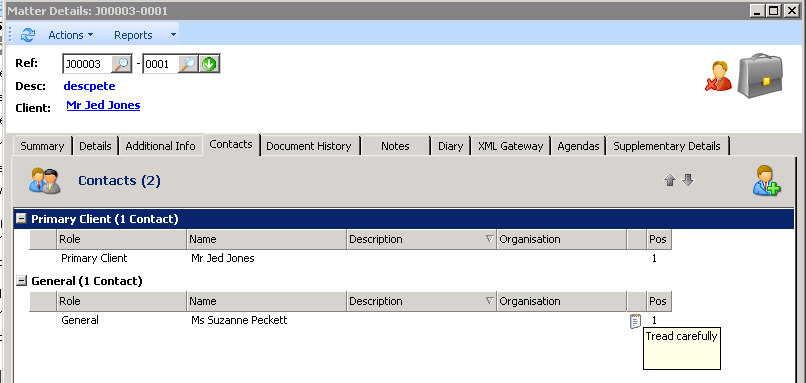
[LCSIL-1885] — View Contact Comments under Contacts Tab. Where comments have been added as a contact is assigned, these are now indicated by a Note icon under the Contacts tab.
When the mouse is over this icon, the full comments are displayed in a tooltip.
— Database
-
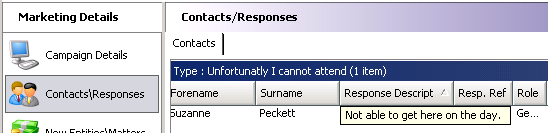
[LCSIL-647] — Contact Response Column in Marketing. There is a new column, Response Description, which can be positioned as required in the Contact Responses screen in Marketing Manual. This displays any description added to the response.
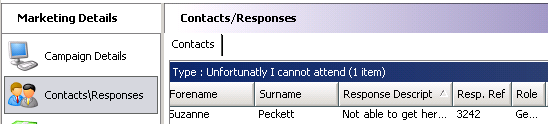
Hovering over the item with the mouse will display the full description as a tooltip.
— Module
-
[LCSIL-660] — Search by Last Touch Date. When searching for entities, it is now possible to use a Last Touch Date range as criteria.
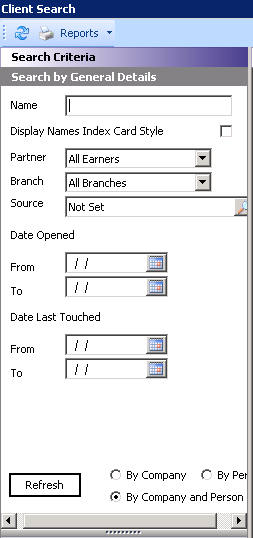
Date Last Touched To and From fields have been added to the Client, Contact, and Service search screens in the Marketing module.
— Module
-
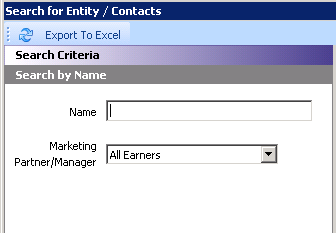
[LCSIL-654]/[LCSIL-649]/[LCSIL-652] — Search All Entities in Marketing. There is a new right-click menu option in the Marketing module named Assign Any Entity/Contact which enables you to search across client, contacts and services.
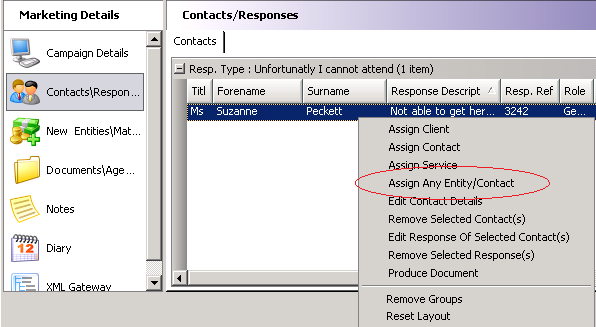
The subsequent search screen allows you to set the criteria using a name and/or the Marketing Partner/Manager.
— Module
-
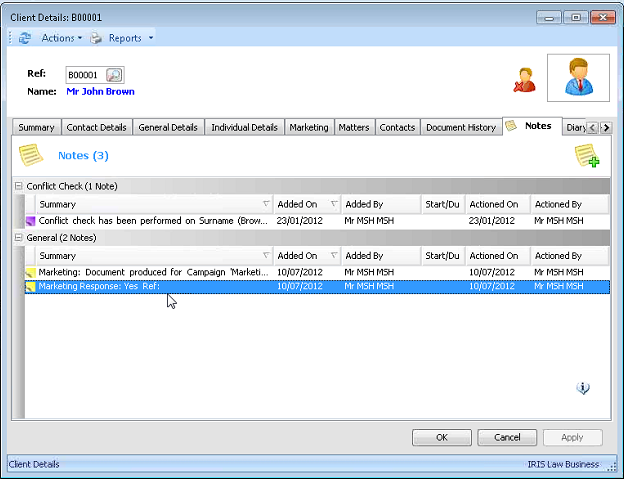
[LCSIL-628]/[LCSIL-637] — Notes Added for Marketing Campaign. A note is now added to the contact Notes tab to indicate when a marketing campaign document/email has been sent. A note will also be added when the response has been received and added to the module.
— Module
-
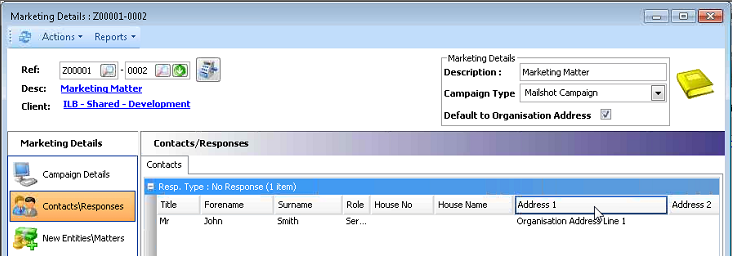
[LCSIL-4491]/[LCSIL-4495] — Default Address for Marketing Campaign. It is now possible to default the address for all contacts to their respective organisation's address.
In the Marketing module, there is a new check box in the Marketing Details in the top right corner, Default to Organisation Address. When this is checked, contacts are added via their organisation, the organisation's address is selected.
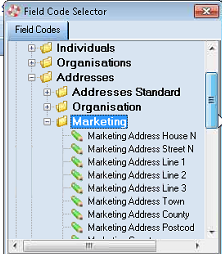
The default address can be overridden on a contact by contact basis by selecting the contact in the list and, using the right-click menu, choose Select Address. A list of available addresses for the contact is displayed for you to choose the appropriate one.
To ensure that the correct address is picked up when merging, there are new fields, available in the Field Code Selector, whether the address for each contact is the default or other.
— Module
- [LCSIL-4136] — IRIS Law Business Licencing. New IRIS Law Business installations will be issued with a licence for a fixed period of time. Should the licence expire, the sites will not be able to create new clients or matters. They will be able to work on existing clients and matters. A warning will be displayed to administrator users 30 days prior to the expiry and there will be a 30 day grace period following expiry before the add client and matter functionality
Note: Existing IRIS Law Business installations will be issued with a licence number with the upgrade CD. This will not have an expiry date so will only have to be entered once.
Following the upgrade before a licence has been added, IRIS Law Business administrators will see the following message when they log onto IRIS Law Business.
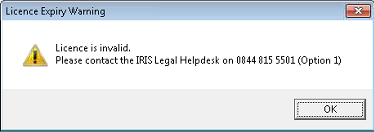
Clicking OK will allow you to proceed and open IRIS Law Business.
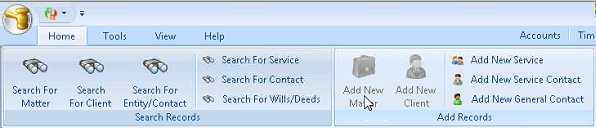
Standard users will not see the above message but will be able to log into IRIS Law Business as usual. However, all users will see that the Add Client and Add Matter buttons and menus will be inactive.
On receipt of the Licence number, administrators should open Utilities / Licencing and Users, expand the Annual Licence folder, right-click on the Annual Key node in the right-hand pane and select Edit. The Add New Licence dialog box displays.
Read the Terms and Conditions and then check the box to confirm you have read and agree to them.
Click on the Next button and the Licence Number dialog box displays.
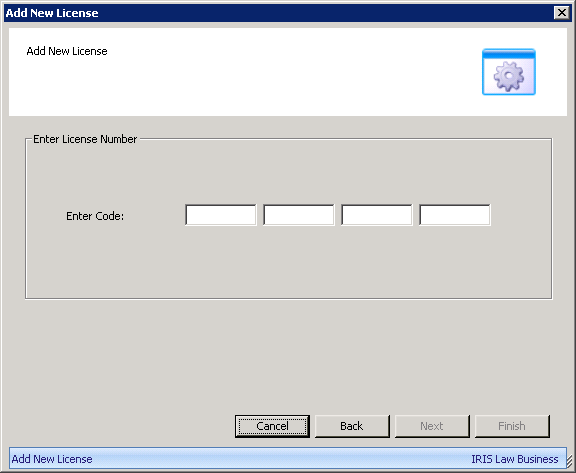
Enter the licence code supplied by IRIS Legal. Once a valid code has been entered click on the Finish button which will have become active.
A message displays confirming the licence has been added and its expiry date.

The expiry date also displays in Utilities against the Annual Licence entry should administrators which to check the date.
Note: For existing IRIS Law Business sites the expiry date will display as 01/07/2012 which will indicate that the expiry option is switched off and the licences are never ending.
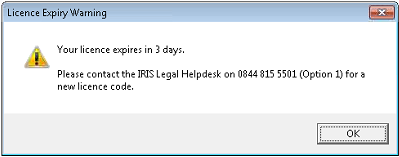
For new sites with licences with a set period, once the licence has been added, IRIS Law Business will perform as usual until 30 days prior to the licence expiry. From that day, each time administrators log on to the system, they will see the following message.
If the licence period expires and the system moves into the grace period, administrators will then receive the following message on log on.
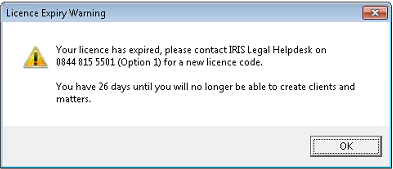
The system will continue to run as usual and it will only be when the grace period has ended that the Add Client and Add Matter functionality is de-activated.
— Database
-
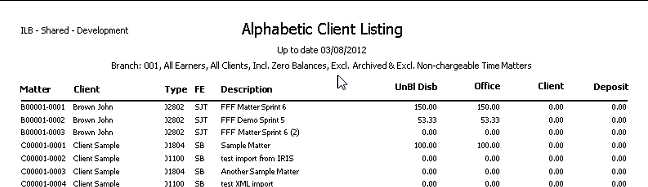
[LCSIL-xxxx] — Financial Report Filters. In order to make the Financial Reports more transparent, details of the filters applied to the report have been included in the headers of relevant financial reports.
In the example below, Alphabetic Client Listing, the header section of the report includes details of the filters used: Date to, Branch etc.
— Accounts
-
[LCSIL-4947] Nominal Transaction View Single Line Option. In Batch View and Accounts Enquiry, there is now an option to view transactions on a single line, instead of two, transaction and VAT amount.
In Utilities / System Parameters there is a new option, Display Office Transactions on Single Lines.
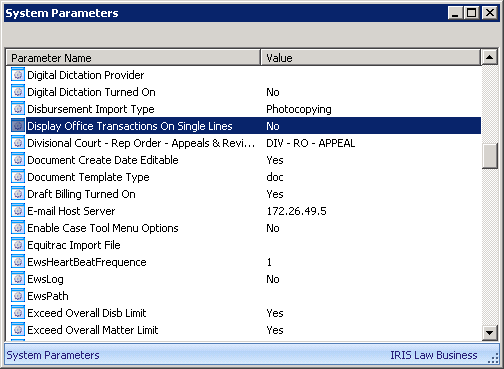
When this parameter is set to Yes, the ledger combines the two lines with a new VAT column.

— Accounts
- [LCSIL-4686] — New Advocacy Type and Archive Option. For the Criminal Public Funding Billing module, in System Parameters, a new Advocacy Type of CMH - Case Management Hearing, has been created.
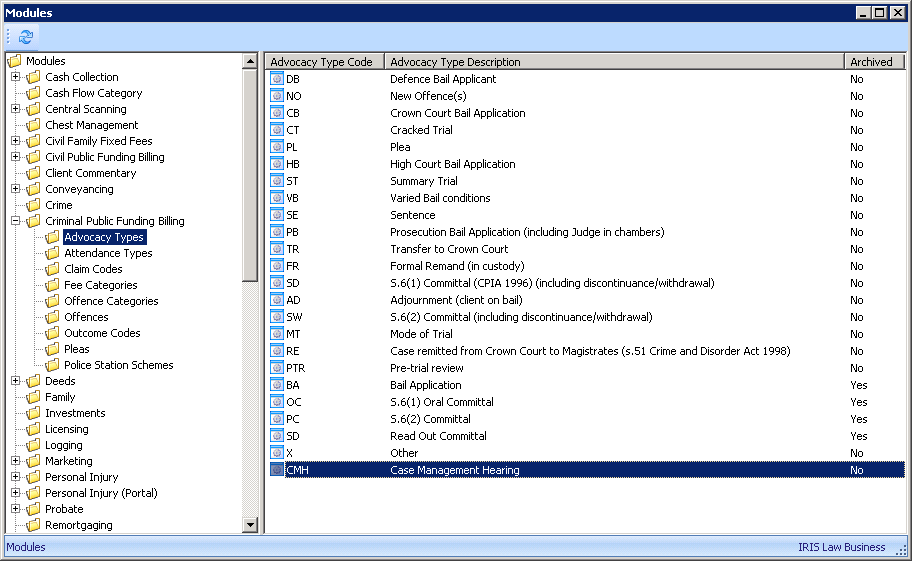
We have also introduced a new Archive column and archived advocacy types PTR, BA, OC, PC and SD so they are no longer available for selection.
— Module
-
[LCSIL-682]/[LCSIL-683] — INT 406 and IHT 411 Improvements. For Laserforms that have a list of items that could take up one page and flow over on to another, such as IHT forms that list bank accounts (406) and stocks and shares (411), the merge process will automatically produce a second and subsequent pages where the number of items exceeds the number of lines available on a page. The result of such a merge process produces a 'bundle' of Laserforms.
Once the Laserforms have been merged, access to the overall bundle of forms is as usual, but to access each additional page within these bundled forms there is a new Forms In File toolbar which has tabs for each of the bundled forms.
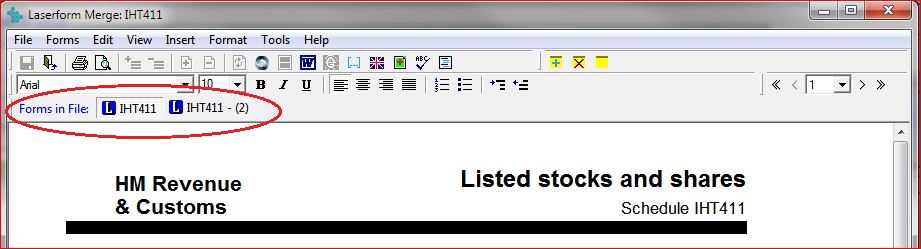
Click on the tab to view each form within the bundle.
The coding for forms IHT 406 and IHT 411 has been improved so data pulled through during the merge process is now allocated to the correct fields.
— Documents
-
[LCSIL-5499] — Receives Marketing Default. A new system parameter has been created which enables you to control whether the default setting for new clients and contacts is to the receive marketing or not.
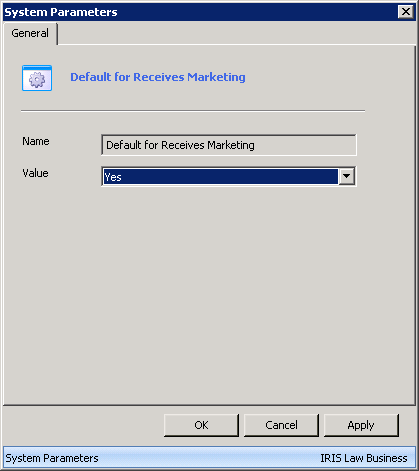
The default setting for the new parameter on upgrade is No so unless you make a change IRIS Law Business will continue as before. However, if you set it to Yes, whenever you create a client or contact from that point on, the Receives Marketing check box under the Marketing tab will be defaulted to be checked.
— Admin
-
[LCSIL-645]/[LCSIL-5312]/[LCSIL-5313] — Contact's Organisation details displayed. In the Marketing module, when searching for a service contact, when a contact is selected from the results list, the service they are associated with is displayed in the bottom pane.
The contact's organisation name is also displayed once the contact has been added to the matter.

Also, a column for the Contact Partner has been added to the grid on the far right.
— Module
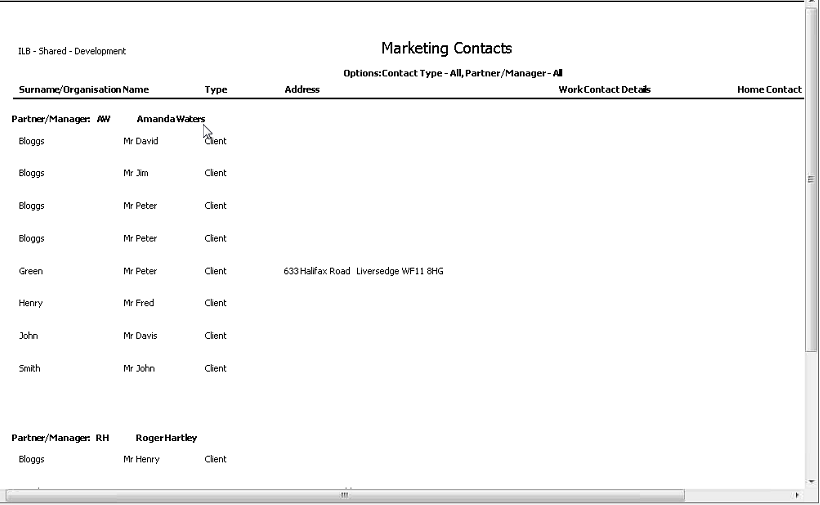
- [LCSIL-640] — New Report Marketing Contacts. A new report, Marketing Contacts, located under the PMS / Marketing folder.
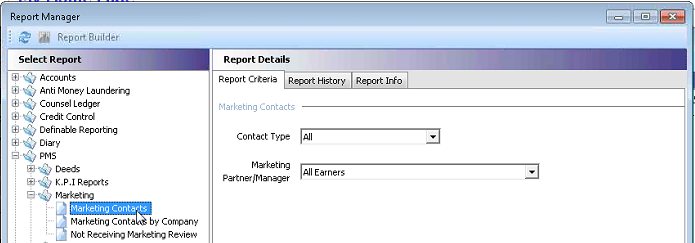
This report lists marketing contacts grouped by Marketing Partner/Manager and can be filtered by the Contact Type and/or the Marketing Partner/Manager.
— Reports
-
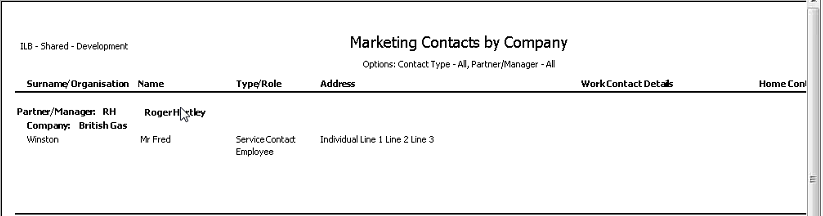
[LCSIL-641] — New Report Marketing Contacts by Company. A new report, Marketing Contacts by Company, located under the PMS / Marketing folder.
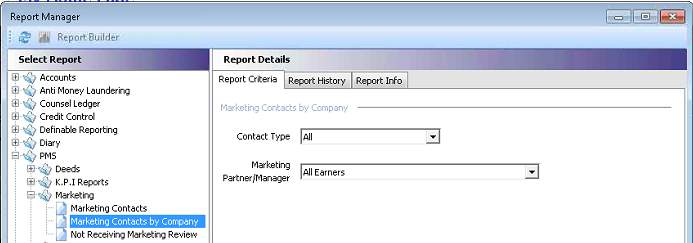
This report lists marketing contacts grouped by the Marketing Partner/Manager then Company (Organisation) and can be filtered by the Contact Type and/or the Marketing Partner/Manager.
— Reports
-
[LCSIL-679] — Probate Assets and Liabilities Summary Report. From the Probate module, Reports menu, there is a new Assets and Liabilities Summery report.
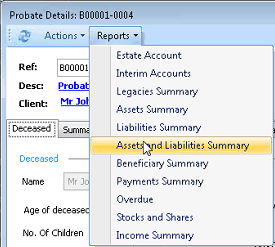
This produces a combined report listing the Assets and Liabilities which saves you having to run the Assets Summary and Liabilities Summary reports separately.
— Module
-
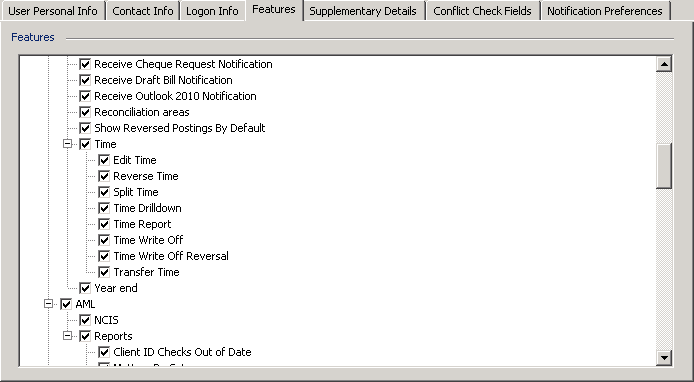
[LCSIL-5421] — User Settings for Reverse and Split Time. Two new Features to allow administrators to give permission to users to Reverse and Split time. To give users permission to one or both of the features, go to Utilities - System Lincensing and Users. Expand the System Users and Users folders and select the Staff folder. Right-click on the relevant user and select Edit. Click on the Features tab and scroll down to the Time folder.
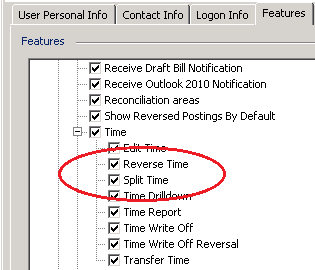
Check one or both of the Reverse Time or Split Time options. Click Apply or OK and exit out of Utilities.
— Admin
-
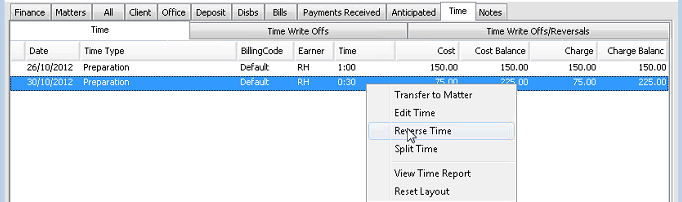
[LCSIL-6302]/[LCSIL-6317] — Reverse Time Entry. Users, which have been given the relevant permission, are now able to reverse time entries using the short-cut menu.
Where appropriate, time entries can be reversed using the short-cut menu.
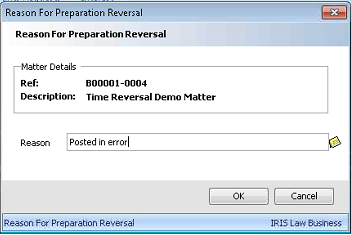
A prompt displays to allow you to enter the reason for the reversal.
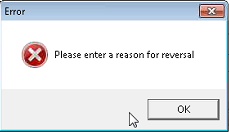
A reverse a time entry requires a reason and you will not be able to proceed without giving a reason. If you click OK without doing so, a message displays which returns you to the previous dialog box when you click OK.
Once a suitable reason has been entered and you have clicked OK, a reverse time entry appears on the ledger.

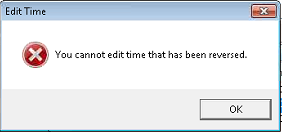
The original time entry and the reversal are linked and IRIS Law Business will stop you from working with the time entry, be it editing, transferring, billing, claiming or writing off. Should you try to work on the entry, the following message, or similar depending on the action you attempted, displays:
If the time is the last item posted, once reversed, the Last Time field under the Finance tab, or in any report that includes it, will ignore the reversed entry and display the previous last time posted date.
When you view the Time Report, it will display the original entry and the reversal and, in the right most column, will display the reason for the reversal.

There is a filter on the toolbar to enable you to suppress a time entry and its reversal.

The above filter also affects the results when you use the shortcut menu and select View Time Report, displaying or hiding reversed time entries according to whether you have the filter switched off or on.
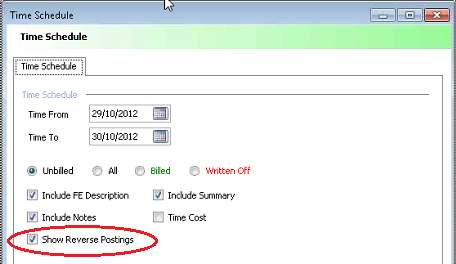
Reports such as Time Schedule and Matter Enquiry now have a Show Reverse Postings check box in the reporting criteria which enables you to elect whether to see any reversals or not.
The Date Last Time will not show a reversed posting date if this is the last entry.
— Accounts
-
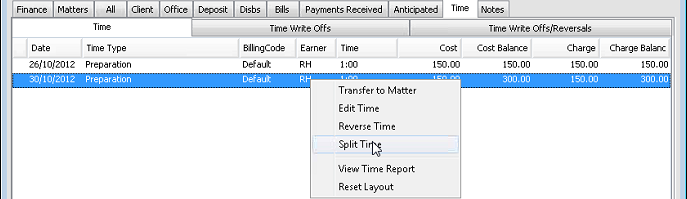
[LCSIL-6304] — Splitting Time. Users, which have been given the relevant permission, are now able to split time entries using the short-cut menu.
Where appropriate, time entries can be split using the short-cut menu.
The following dialog box displays:

The dialog box is in three sections, displaying the Matter Details, the Original Time Transaction and the Split Into Two Transactions.
You are only able to amend the first Units field in the bottom section. As you amend this field, the other Units field adjusts so the total time remains equal to the original posting. Also the Charge and Cost field recalculate.
Once you have set the split and click Save & Exit, back at the Time ledger, the original posting is displayed as reversed and there are two new split time entries.
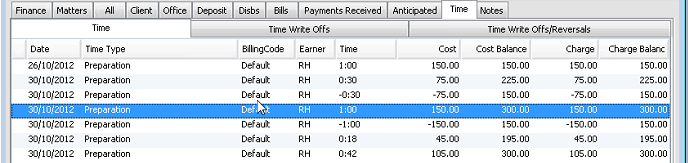
The new time entries are standard entries and can be worked on a usual, including splitting further.
You can also split time when posting a bill.

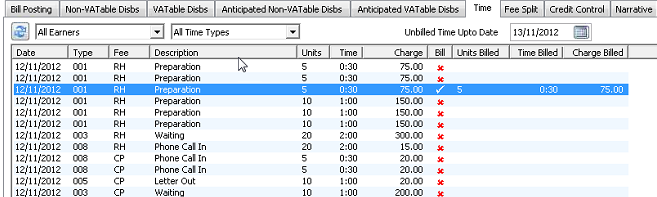
Under the Time tab, there are some new columns, Units, Units Billed, Time Billed and Charge Billed. The Time Cost column has been removed for space reasons.
When the cross in the Bill column is clicked on, the last three columns are completed.
To split the time you need to bill all of it by clicking on the cross.

You can then right-click and select Part Bill Time ... This displays the split time dialog box and you can change only the Units to Billed field with the others recalculated as you change it.
When you click Save & Exit, you are returned to the Posting Bill screen with the following details.

When you Save & Exit to post the bill, you are returned to the Accounts Enquiry screen showing unbilled time.

Initially this displays unbilled time where you can see the remaining units not billed together with the original time entry, which has been reversed. Switching the filter to Billed will display the split figure which has been billed.
— Accounts
-
[LCSIL-6768] — New Time area in User Features. Under the user Features tab, all the time features have been moved to a new Time folder, under the Accounts folder, for ease of use. There have been some minor changes to the labels for uniformity.
Edit Time - previously Can Edit Time
Reverse Time - previously Can Reverse Time
Split Time - previously Can Split Time
Time Drill Down - previously Access Time Drilldown
Time Report - previously View Time Report
Time Write Off
Time Write Off Reversal
Transfer Time - previously Can Split Time
— Admin
-
[LCSIL-6306] — New filters in the Bill Posting Time tab. To improve efficiency two filters have been added to the Time tab in Bill Posting which enables users to quickly locate the relevant entries on matters where there are a large number of outstanding items.
The drop down default to All Fee Earners and All Time Types. You can use a combination of Fee Earners and Time Types to reduce the list and quickly locate the require entry.
— Accounts
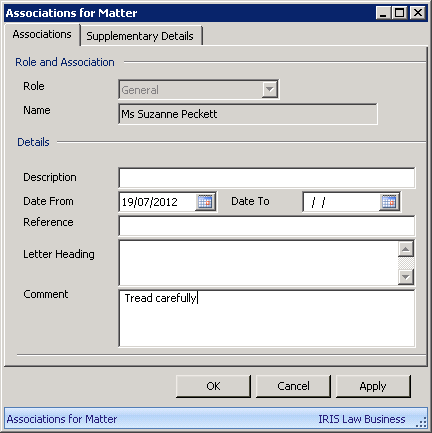
- [LCSIL-3332] — Association Contact Roles. You can create custom Association Roles via Utilities / Firm Options. Complete the dialog box below and then click on the Modules tab to set which module(s) the role can be used with.
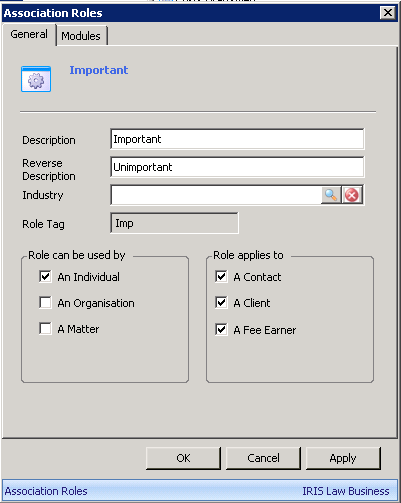
However, if you create a new Association Role type in Utilities for use with a module it is not automatically made available for PMS. To allow your new role type to be visible in PMS then you must tick the PMS setting as well under the Modules tab.
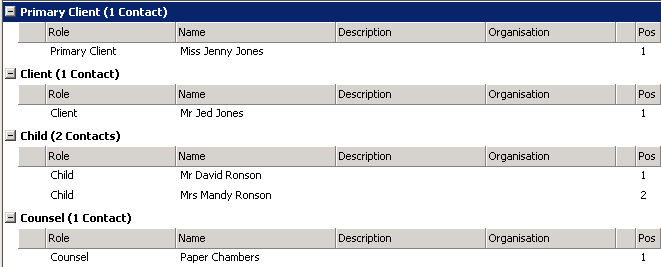
You will also see there is a new column, called Position, when viewing the Contact tab. This is in readiness for version 2.0.0 and is a numeric column to enable you to select a specific contact where you have more than one contact with the same role when coding the new Workflow and New Document Merge processes.
— Admin