Once you have located the required field, highlight the field and click on the Insert button which will now be active.
Alternatively you can double click on the field to insert it.
The field will be inserted in the document at the cursor position, but can, if necessary, be moved using the standard Word functions.
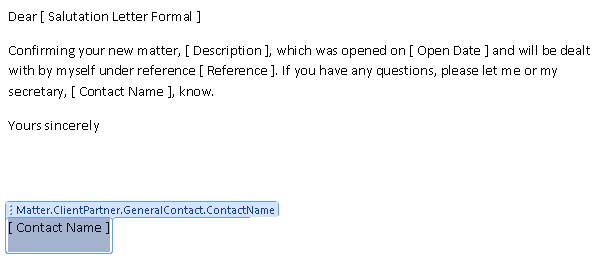
The field labels display in the document with square brackets around them, but when you click on, or cursor to, them, they display as the Client Partner one does, giving the full field name, otherwise this would display as [Contact Name].
In the above example there are two Contact Name fields. In this case, the first, for the secretary's name, and the second, for the partner's name. This can be confirmed by clicking on the field label, as above on the Partner Contact Name field as specific field information is then displayed above the field label.
You can make the coding in the template easier to read by amending the merge field labels. To change the labels, click on the field label and type a more user friendly name. This does not affect the link to the database field or the data pulled through.

The example above shows the amended labels as [ Secretary Contact Name ] and [ Partner Contact Name ], although if you click on Partner Contact Name you will see the link is still to the Matter.ClientPartner.GeneralContact.ContactName database field as in the previous screen shot.
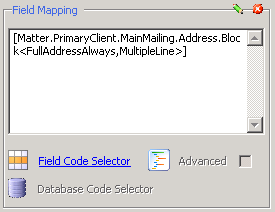
Once you have the relevant form open, select the required field and click on Field Picker. Select the field as above, set any formats and click Insert or double click on the Insert button.
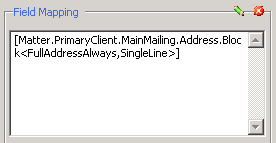
There are some differences as to how the end coding is displayed between Document Templates and the Customer Laserform Mapping tool, such as with the Address Block field. Rather than displaying a list of individual codes, it displays as below for the multi-line version.
And as below for the single line option.